
This guide provides a step-by-step workflow connecting tissue preparation, microscopic region selection, IR or UV microdissection, sample collection, RNA extraction, and quality assessment. It covers fresh-frozen and FFPE research specimens while distinguishing general best practices from the instrument- and assay-specific parameters that must be validated separately.
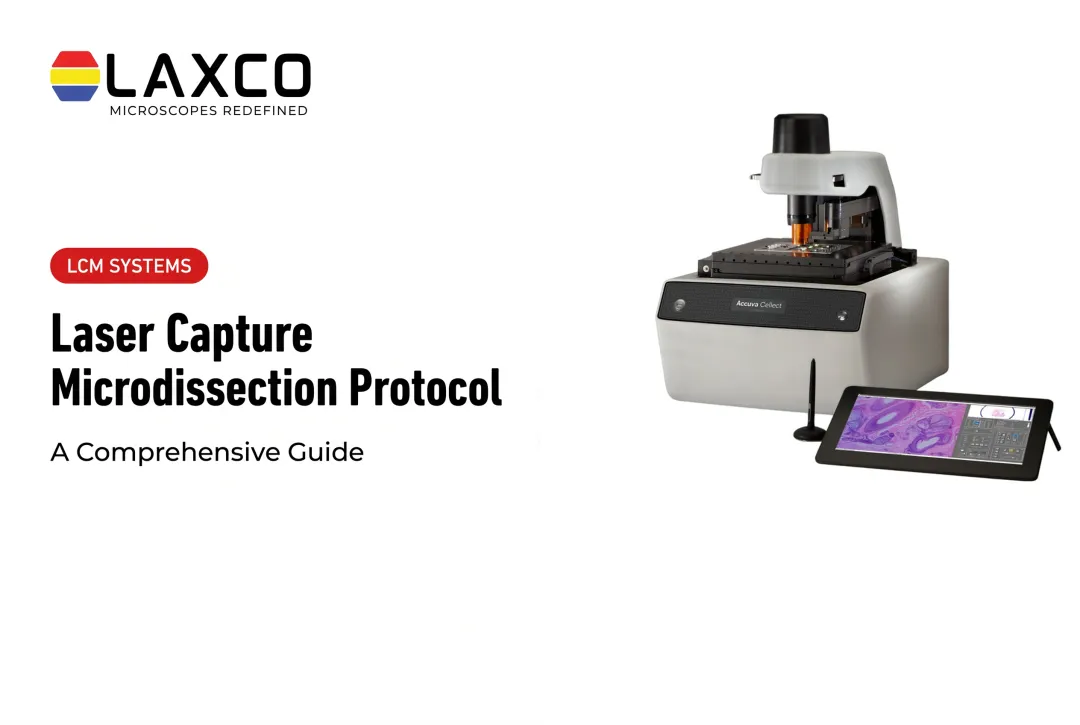
Laxco's Accuva Cellect supports the cell-isolation stage of this workflow. RNA purification, reverse transcription, RT-qPCR, and sequencing are separate downstream laboratory procedures.
Key Takeaways
- Limit time, temperature, and RNase exposure at every step from tissue collection to lysis.
- RNA integrity is commonly assessed with the RNA Integrity Number (RIN) or DV200, and acceptable thresholds depend on the downstream assay.
- Slide compatibility, tissue preparation, target identification, laser mode, and capture verification are essential steps before low-input RNA extraction.
- Stain choice and exposure time can affect RNA integrity, so both should be validated.
- RNA yield should be reported with tissue type, capture area, and number of sections.
Why RNA Integrity Is the Main Challenge
RNases are present on skin, surfaces, and many reagents. RNA in tissue sections is exposed to these enzymes during staining, dehydration, and microdissection.
The RNA Integrity Number (RIN) is a standard quality measure reported on a scale from 1 (degraded) to 10 (intact). It was introduced to replace subjective assessment of ribosomal RNA bands (Schroeder et al., 2006). DV200, the percentage of RNA fragments longer than 200 nucleotides, is often used for fixed or partially degraded samples.
Acceptable thresholds vary between published LCM studies and downstream assays. Each laboratory should define its own criteria based on pilot data.
Small Inputs Leave Little Margin
LCM captures are small, and yields from a single session may be in the low-nanogram range or less. Losses during transfer or extraction therefore have a large effect on the final result.
Establishing an RNase-Free Workflow
- Decontaminate surfaces and tools with an RNase decontamination reagent before starting.
- Change gloves frequently, especially after touching shared equipment.
- Store RNA reagents separately from other laboratory reagents.
- Use certified nuclease-free water. If water is treated with DEPC, ensure residual DEPC is removed, because it can inhibit reverse transcription.
Step 1: Tissue Preparation
Cryosectioning
Cryosectioning suits brain, tumor, and other fresh-frozen tissues:
- Snap-freeze tissue promptly after collection.
- Cut cryostat sections, commonly around 8–12 μm for mammalian tissue.
- Fix and stain sections promptly with RNA-compatible reagents.
Stain choice can affect RNA integrity. Compare candidate stains on pilot sections before starting a full study.
Wax Embedding
Alternative embedding methods, including low-melting-point wax preparations, may be useful for delicate or difficult-to-section tissues. However, wax choice, removal procedures, section thickness, and RNA preservation must be validated for the particular specimen and microdissection method.
For routine fresh-frozen or FFPE LCM workflows, follow the preparation and slide requirements established for the selected tissue and capture system rather than adopting an embedding method based solely on tissue fragility.
Formalin-Fixed Paraffin-Embedded Tissue
Formalin fixation chemically modifies and fragments RNA. FFPE samples can still be used, particularly for assays that target short fragments, but fresh-frozen tissue is generally preferred when RNA quality is critical.
Slide Preparation
Select slides according to the tissue preparation and the laser-isolation mechanism.
- IR thermoplastic-film capture: confirm the required slide and collection-cap combination. The tissue section generally must be suitably dehydrated and dry so that the capture film can adhere to the selected material.
- UV cutting: confirm whether the workflow requires membrane-coated slides or another compatible substrate. Membrane condition, tissue adherence, and section preparation can influence cutting and recovery.
- Before loading the slide: confirm that the section is intact, target regions remain identifiable, and the preparation meets the instrument's staining and dehydration requirements. Check membrane slides for wrinkles, scratches, trapped moisture, or other defects that could interfere with cutting.
Slide type and drying requirements are not interchangeable across all LCM systems. Follow the validated preparation instructions for the specific instrument, tissue, preservation method, and downstream RNA assay.
Step 2: Microdissection and Collection
Once tissue preparation is complete, the next objective is to isolate the intended cells or regions while preserving their identity and minimizing RNA degradation.
The following sequence is a general LCM procedure. Exact instrument controls, laser parameters, capture-device handling, and timing must follow the manufacturer's operating instructions and the validated laboratory protocol.
1. Prepare the Instrument and Collection Materials
Load the appropriate slide and compatible collection device. Confirm that the microscope, laser system, and collection mechanism are ready for use.
Before processing valuable study material:
- Verify the optical focus and laser alignment according to the instrument's operating procedure.
- Prepare RNase-controlled collection caps or vessels and compatible extraction or stabilization materials.
- Confirm sample identifiers and document the planned region of interest.
- Optimize capture settings on representative test tissue rather than assuming settings published for another instrument will work.
2. Identify and Document Target Cells
Examine the stained or unstained tissue section at a magnification suitable for identifying the desired cells or anatomical compartment.
Use morphology, staining, or other validated criteria to distinguish the target from surrounding tissue.
Record or document the region of interest before capture so that the isolated material can be linked to its location in the original section.
3. Select the Region for Laser Isolation
Use the instrument's target-selection controls to define the intended capture area.
For IR film-based capture, identify the cells or small regions that will be transferred to the compatible collection surface.
For UV cutting, define the cutting boundary around the intended region while minimizing unintended damage or inclusion of neighboring tissue.
The correct boundary, target area, and collection method depend on tissue thickness, morphology, and instrument capabilities.
4. Perform Laser Capture or Cutting
Use the validated IR or UV isolation procedure:
- IR capture: the laser activates the compatible capture mechanism so that selected cells or tissue regions adhere to the collection film or surface.
- UV cutting: the laser separates the selected region from surrounding tissue, after which the instrument's compatible collection mechanism is used to recover the material.
Do not apply universal laser-power settings, pulse durations, cutting speeds, or capture times. These parameters must be established for the instrument and tissue preparation.
5. Verify Capture Quality
Inspect the tissue section after isolation and, where the system permits, examine the collection surface.
Check whether:
- The intended region was fully captured or separated.
- Unwanted neighboring material was included.
- Residual tissue remains in the original target area.
- Additional capture is needed to obtain the required material.
Record the capture outcome and any deviations from the intended region selection.
6. Stabilize the Collected Material
After successful collection, use the lysis, stabilization, or storage procedure validated for the target RNA assay and collection device.
Minimize unnecessary delay between staining, laser isolation, and stabilization. The acceptable interval depends on tissue preparation, humidity, handling conditions, and the downstream analysis.
Avoid applying a universal maximum time on the microscope stage.
7. Confirm Material Available for RNA Extraction
Before extraction, record the number of sections, captured regions or cells, approximate capture area where available, and collection conditions.
Where the collected material is insufficient, additional captures may be combined when the study design allows pooling of biologically appropriate material.
Pooling changes the analytical unit: RNA extracted from multiple captured cells or regions represents the combined sample rather than independent expression measurements for every captured cell.
Step 3: Extraction and Quality Assessment
Once selected cells or tissue regions have been collected, RNA recovery must be adapted to the small sample input and the preservation method. The following steps describe the decisions required for a reliable extraction workflow; exact reagent quantities, incubation conditions, centrifugation settings, and elution volumes must follow the selected kit's validated protocol.
1. Lyse the Collected Material
Apply the extraction chemistry recommended for the collection device, tissue preparation, and downstream assay.
- For fresh-frozen samples, use a low-input RNA extraction procedure compatible with the captured tissue and its storage or stabilization conditions.
- For FFPE samples, use a method specifically designed to address formalin-induced fragmentation, crosslinking, and other chemical modifications. Appropriate deparaffinization, digestion, and crosslink-reversal steps may be required depending on the sample and extraction method.
Confirm that the collection cap or other recovery substrate is compatible with the chosen lysis procedure.
2. Purify RNA With a Low-Input Method
Use a column-based, bead-based, or other validated low-input extraction method appropriate to the sample amount.
To minimize loss:
- Use suitable low-binding, RNase-free consumables.
- Avoid unnecessary sample transfers.
- Follow the minimum input and elution requirements of the extraction method.
- Include extraction controls or blanks when appropriate to the study design.
Do not assume that a conventional bulk-tissue extraction method will recover RNA efficiently from very small LCM samples.
3. Address Genomic DNA Contamination
Determine whether genomic DNA removal is needed for the intended RT-qPCR or sequencing assay.
Where required, use an RNase-free DNase treatment compatible with the extraction chemistry and available RNA quantity.
Assess the effect of additional treatment steps on recovery, particularly when sample input is limited.
4. Measure RNA Quantity and Integrity
Use quality-control methods suited to low RNA concentrations.
- RNA quantity: use a validated high-sensitivity quantification method. UV absorbance measurements may be unreliable at the very low concentrations obtained from some LCM samples.
- RNA integrity: use capillary electrophoresis or an equivalent validated method when sufficient material is available. RIN can be informative for relatively intact RNA, while DV200 may be more useful for fragmented or FFPE-derived RNA.
- Assay compatibility: interpret quantity and integrity together with the requirements of the planned RT-qPCR assay or RNA-seq library-preparation method.
No single RIN or DV200 threshold applies to all LCM-derived RNA samples.
5. Document the Extraction Outcome
Record tissue type, preservation method, stain, collection method, capture area or estimated cell input, extraction chemistry, final RNA quantity, and quality-control measurements.
If the extracted amount is inadequate, review the captured material, capture efficiency, sample handling, extraction losses, and assay input requirements before changing the microdissection procedure.
Researchers should perform a pilot workflow with representative tissue before processing valuable cohorts.

Common Problems and Solutions
- Sections fail to transfer: check slide compatibility, tissue adherence, capture settings, and the collection mechanism. For IR thermoplastic-film capture, residual moisture can interfere with transfer to the collection film, so follow the validated drying requirements. For UV cutting, check section preparation, membrane condition where applicable, cutting completeness, and the collection method rather than assuming insufficient dehydration is always the cause.
- Degradation after capture: minimize delays and follow the validated lysis, stabilization, and temperature requirements for the collection device, RNA extraction chemistry, and downstream assay.
- Low yield from small regions: pool multiple sections or captures from biologically matched material.
- Membrane problems with tough tissue: test alternative slide types for thick or mechanically resistant samples.
- Lower integrity at block edges: trim outer regions of wax-embedded tissue if they show lower integrity.
Choosing an LCM System for RNA Work
Consider:
- Laser options for single cells and for dense tissue
- Imaging quality for accurate region definition
- Software that documents selected regions and supports quality control
- Compatibility with your downstream RNA workflow
Laxco Accuva Cellect for RNA Workflows
Laxco's Accuva Cellect Laser Capture Microdissection System supports the tissue-isolation stage of microgenomics workflows. Researchers can collect selected cells or tissue regions before carrying out RNA extraction, RT-qPCR, or sequencing using separate downstream laboratory procedures. The instrument does not itself perform RNA purification, reverse transcription, qPCR, or sequencing. Its documented features include:
- Infrared (IR) laser: designed for capture of single cells or small numbers of cells.
- UV laser: designed for cutting dense structures, such as bone or plant tissue.
- Sample preparation: Laxco lists FFPE and fresh-frozen tissue, H&E-stained and LCM-optimized stains, immunofluorescence, unstained samples, and cell culture.
- Collection: compatible with CapSure LCM caps.
- Software workflow: a five-step workflow with visual quality control.
Laxco's LEAP AI is a separate microscopy and image-analysis platform combining Accuva LEAP optics with Media Cybernetics Image-Pro AI. It is not documented as an integrated Accuva Cellect region-selection or laser-capture feature. For Accuva Cellect, Laxco lists training and 48-hour response times. RNA extraction and downstream molecular analysis are performed through compatible laboratory workflows rather than by the microdissection instrument itself.
Frequently Asked Questions
What RNA integrity is acceptable for LCM samples?
Acceptance criteria depend on the downstream assay, RNA quantity, fragmentation, and sample-preservation method. RIN is commonly used for relatively intact RNA, while DV200 can be more informative for FFPE-derived RNA. Some RNA-seq library methods are designed for fragmented RNA, whereas other methods require higher integrity. Targeted RT-qPCR performance also depends on factors such as amplicon length. Follow the library kit or assay's validated input requirements and use pilot samples rather than applying one universal integrity threshold. See Illumina's guidance on FFPE RNA quality assessment.
Can I extract usable RNA from microdissected FFPE tissue?
Yes, with adapted methods. Formalin modifies and fragments RNA, so assays targeting short fragments tend to work most reliably. Optimized protocols have improved RNA recovery from small FFPE captures, and fresh-frozen tissue remains preferable when integrity is critical.
How long can sections stay on the instrument before RNA degrades?
There is no fixed limit. Exposure time, humidity, staining, and fixation all affect RNA stability. Published protocols allow different windows, so measure integrity over time on test sections and set your own maximum capture time.
Which stains are compatible with Accuva Cellect for RNA work?
Laxco lists H&E staining, LCM-optimized stains, immunofluorescence, and unstained sections for Accuva Cellect. Use RNase-free reagents and short staining times, and test candidate stains on pilot sections before staining study samples.
What training is available for new users?
Laxco lists training and 48-hour response times for Accuva Cellect. Confirm the available training formats, service terms, and assistance with RNA-sensitive sample preparation directly with Laxco. Appropriate training in tissue handling, capture efficiency, and RNA stabilization can help reduce avoidable sample losses.